2018 was definitely the Year of the Black Panther! Even in the months before the film’s release, buzz was already heavy with magazine articles, trailers, and other teasers. Before the Becoming episode, I’d already taken a commission for the Jabri leader M’Baku’s armor set.
The Challenge
My client hadn’t planned to wear the armor until the summer convention season, BUT to make that timeline I needed to start much sooner. Generally, I am not a fan of beginning projects based on promotional images or paparazzi photos from the set as often times colors are not true and costumes may go through revision during filming. The July 2017 Entertainment Weekly (EW) Comic Con issue is a prime example. There are subtle variances to some of the costumes that appeared in the spread, which are never seen on screen. Although it was a our first look at the M’Baku armor’s detail, it also had an interesting color scheme: a deep blue with orange highlights. It’s possible this is the result of editorial choices made in processing the image, but it’s also possible this variant of the costume does exist. The photos my friends sent back from SFDC and trailer clips depicted the armor’s organic pieces to be a more natural brown/black. We decided to hold off on paint until after the film’s release.


“Everything in Jabari land is made out of this sacred wood that can essentially go toe-to-toe with a Vibranium sword or a Vibranium weapon because it’s this tempered, strong, treated wood.” — Winston Duke discussing Jabari armor and weaponry with EW
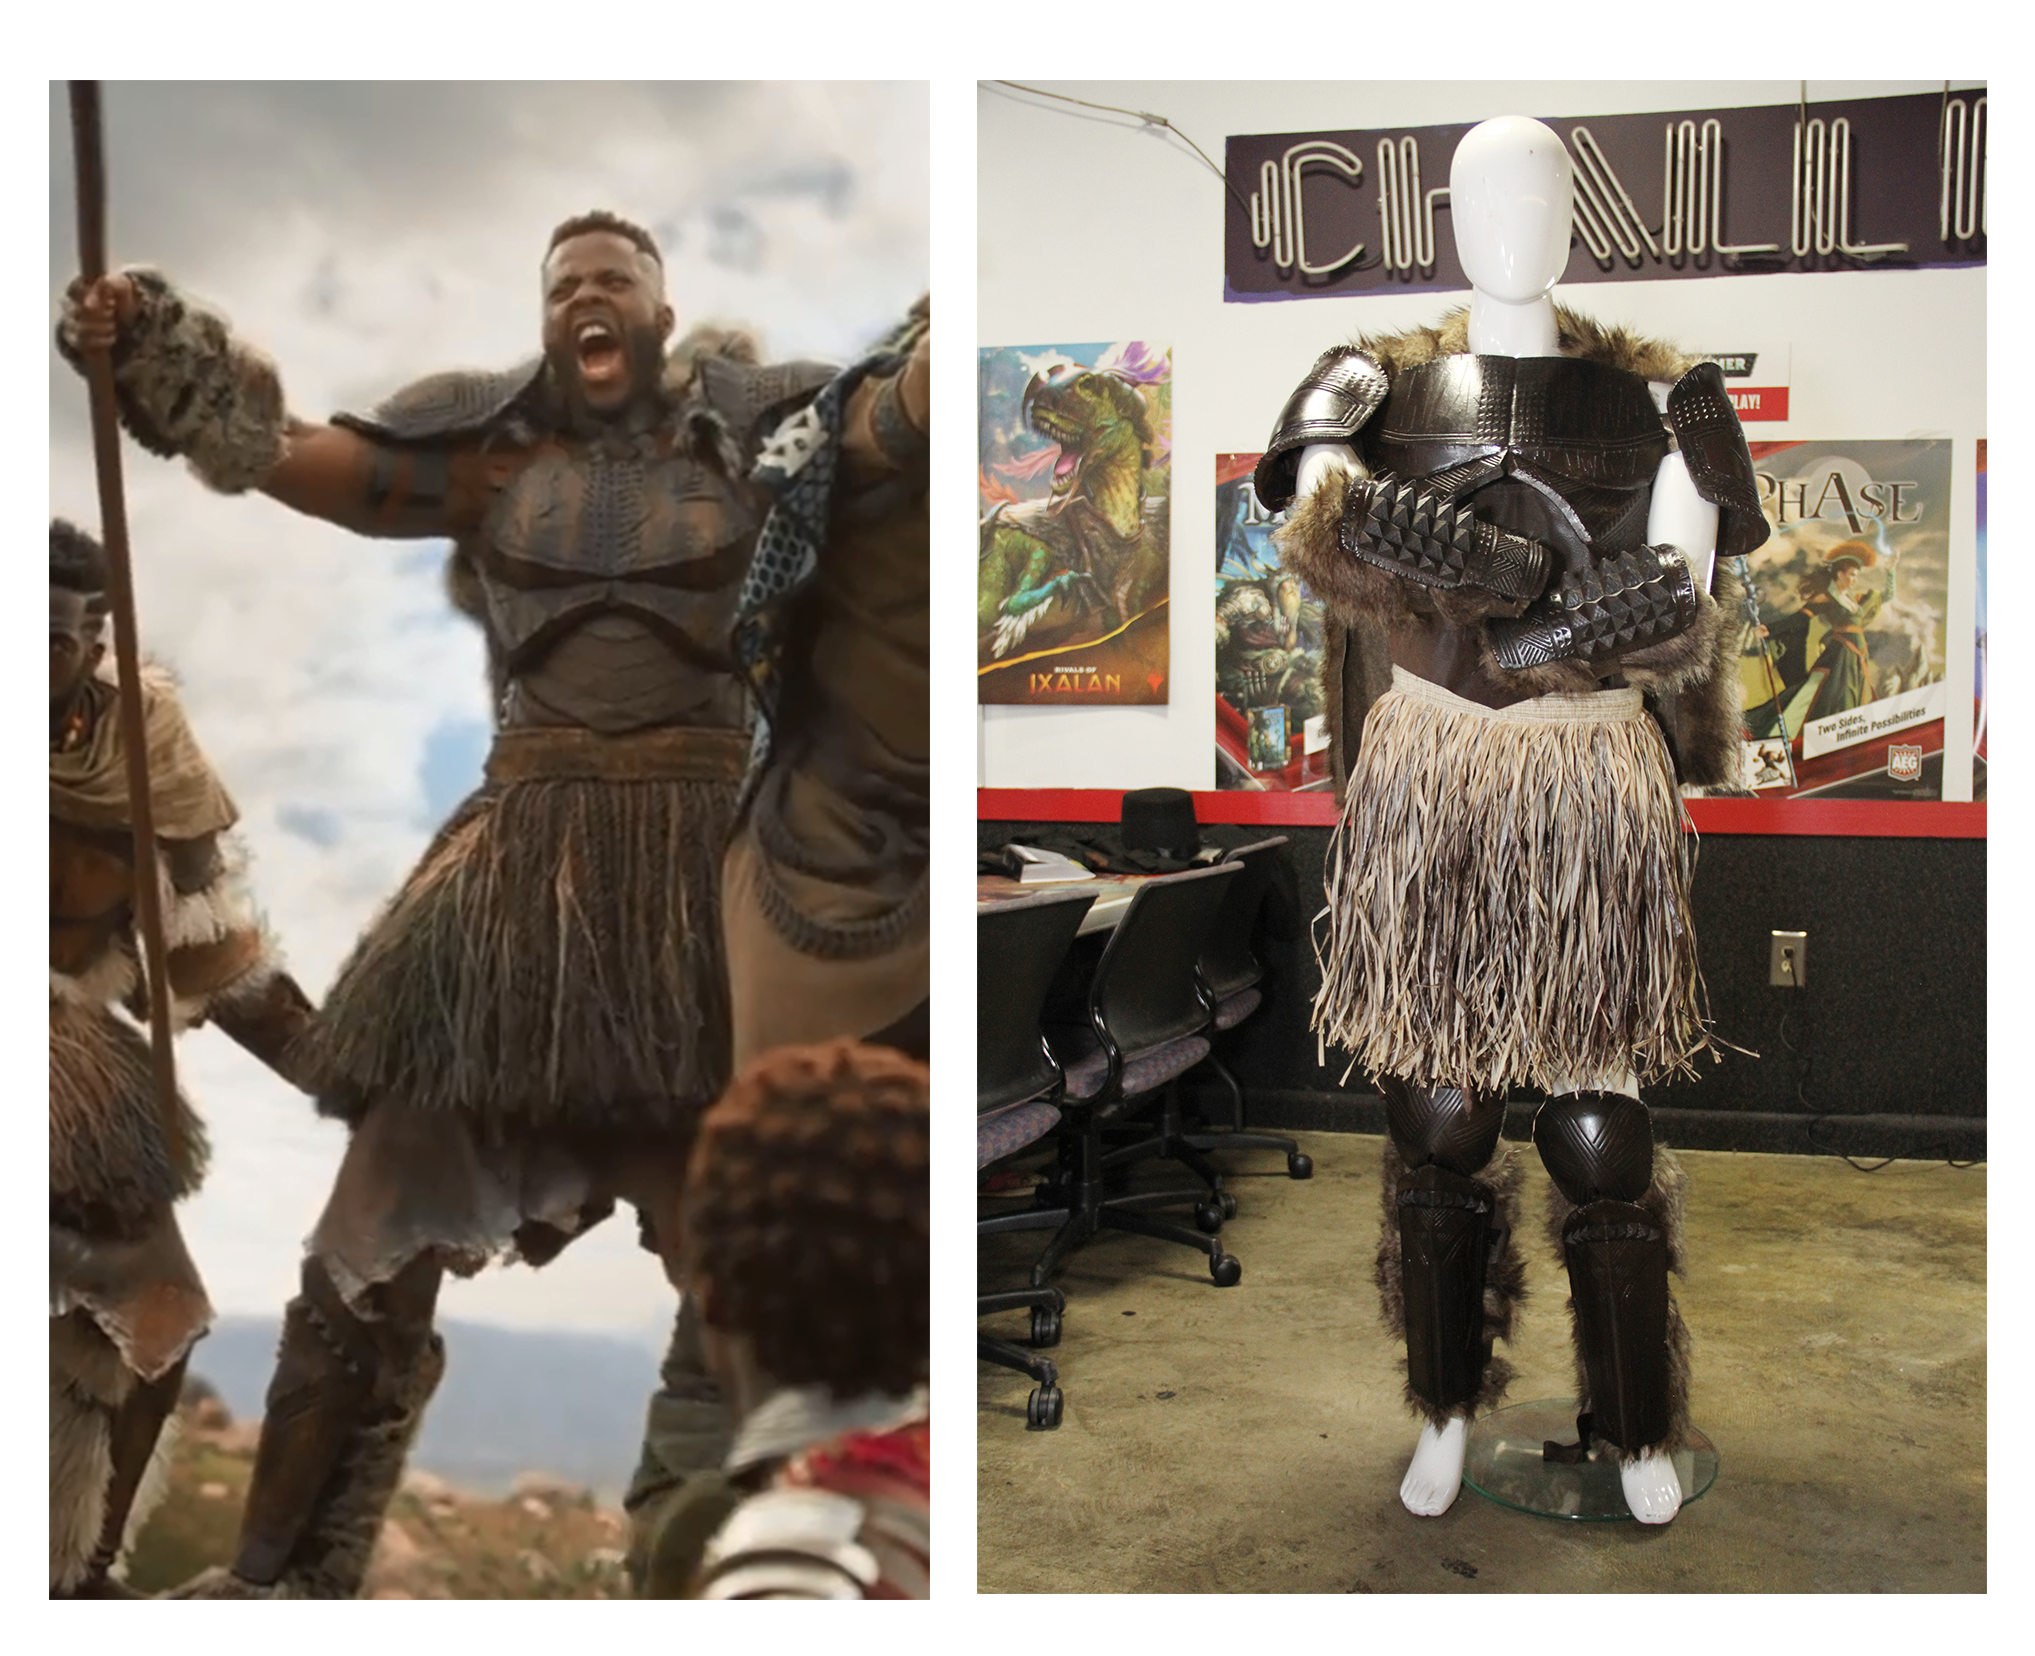
The Jabari have chosen to shun Wakanda’s dependence on vibranium and technology. As such, their amor is organic and hand-crafted from hardwood with fur and leather embellishments. The one element every photo agreed on was the intricate engraving and overall dimensional nature of the pieces. Each element was decidedly unique with the kind of imperfections one would expect from carved and handcrafted wood. The armor carries a certain weight/heaviness; even without its sacred origins, it’s very apparent it’s both durable and functional. The overall design is also very masculine with its exaggerated pectoral plates and over-sized epaulets.
The Build
I started with creating Illustrator patterns based on the available promotional images and a lot of fan shots. Although the magazine had clear views of the chest, I relied heavily on friend’s photos from the costume exhibit at SDCC and fan pictures from the exhibit’s stop at D23 Expo. Most pieces would require layering to achieve the necessary dimensional quality.
I spent a fair amount of time considering and testing various materials. From actually enlisting my dad to carve real would to sculpting clay models that I could resin cast later. My client had indicated he traveled to several out of state cons via air, so something lighter would be preferable. in the end, EVA foam won out.
The pylons on the gauntlets and shin guards were modeled and printed in PLA. I decided to leave them as grouped “sheets” to facilitate bending/curving the set to better fit the contour of the gauntlet. These elements were later added using contact cement with DAP caulk to seal any gaps.
The hard part: Beyond the organic nature of the wood pieces, I also had to contend with rendering an ‘engraved’ look to foam. I went through several rounds of test failures:
- Scoring with an Xacto followed by using a heatgun to define cuts. I used transfer paper to mark the foam, but the resulting patterns were neither deep enough, nor did they have the chiseled marks from mechanical tooling.
- Hot knife with various tips. Even while using a unit with a thermostat, engraving EVA is still a difficult task as melting is almost impossible to avoid. EVA also releases toxic gases when burned. I ALWAYS wear a respirator (not a dust mask) for this kind of activity.
- Rotary tool/Dremel. Yes, I was a starting to get disappointed, but I soldier on. I have a wide assortment of Dremel tips. The stone grinders and narrow metal engraving tips, most closely got me to my desired result, HOWEVER, a smaller rotary tool couldn’t stand up to denser foam tiling and the regular-sized tool was difficult to maneuver. Even with the flex shaft and control pedal, controlling speed and depth was a challenge. The longer lines were okay, but the legions of nearly symmetrical triangles, just wasn’t working out.
- Laser cutting: a more expensive, but accurate solution. Just as I was about to go back to trying a sculpt, I got an email reminder from Decatur Makers that they were offering a class on using their Glowforge. Months before I had seen an announcement when it arrived, but at the time I wasn’t clear on its capabilities. The “3D laser printer” tagline was very confusing. I popped in for the class and was hooked! Later that week, I took in a few prototypes of the base shapes for the pectoral and one shin to tryout how it would fair engraving EVA. With a bit of tweaking to the machines settings and my own files and I was getting exactly what I wanted!
Since you aren’t supposed to make for-profit items at the space, plus it was ALWAYS booked (seriously, I went by once at 3AM on a Tuesday and there were people waiting), I decided to pull the trigger and get my own unit. (You can read more about my Glowforge adventure here.) Oddly, I managed to place my order during some kind of magical window. They’d just sent out their last Kickstart fulfilments and I was able to have a unit shipped and in my shop in less than a week!
Even with the laser taking care of most of the heavy lift, I still needed to use the Xacto, hot knife and heat gun to add additional detailing and shape. Layers were glued using contact cement with caulk a seam filler and smoothing agent.
The Ooops
The Glowforge can use a number of different formats, but I prefer to use SVGs exported directly from my Illustrator patterns. There are very specifics steps for doing this however, which I apparently missed. The SVGs used to cut my first set of shins and gauntlets were about 25% smaller than their original sizes. I also wasn’t happy with the detail and overall look of the 4mm EVA. I replaced most of these parts with the right-sized files on thicker EVA tiles from Amazon.
[masterslider id=”1″]
You must be logged in to post a comment.